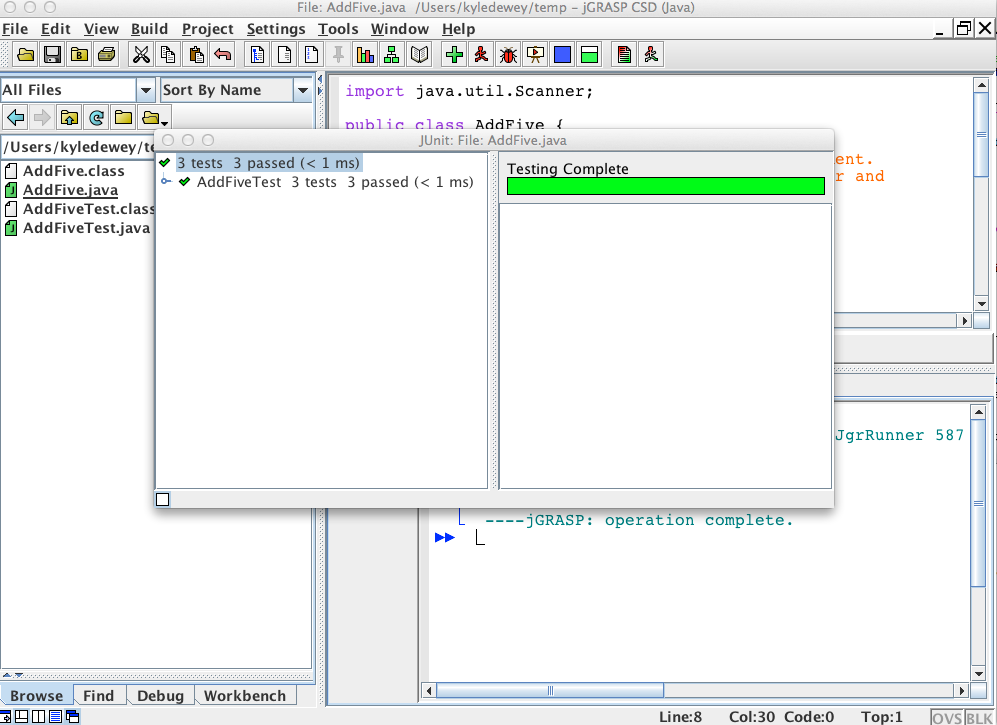
This guide covers two big things related to JUnit:
We start with the initial setup.
While jGrasp has built-in support for JUnit, it does not come preinstalled with JUnit. This is analogous to the fact that jGrasp has built-in support for the Java Development Kit (JDK), but it does not come preinstalled with the JDK. However, unlike with the JDK, jGrasp cannot automatically figure out where JUnit is, so we need to configure it to know where it can find JUnit. The instructions below accomplish just that.
Once jGrasp has been configured to use JUnit, you do not need to fo through these configuration instructions again.
Create a folder/directory where you will later save some JUnit installation files.
The exact name or location of the folder/directory doesn't particularly matter, though the folder/directory should be in a relatively permanent location which you can easily reference later on.
For example, if you have a USB drive which you carry between the lab and home, it'd be good to put this folder on the USB drive.
If you're unsure of what to name this folder/directory, the name junit_setup will work.
There are two binary files which you need to download, listed below:
These files need to be saved in the folder/directory which you created in the previous step.
Exactly how you perform the download depends on which Web browser you're using.
For both Firefox and Chrome, you can right-click the above links and choose “Save Link As...”, and then navigate to the target folder/directory and save.
Exactly how you do this depends on your particular configuration.
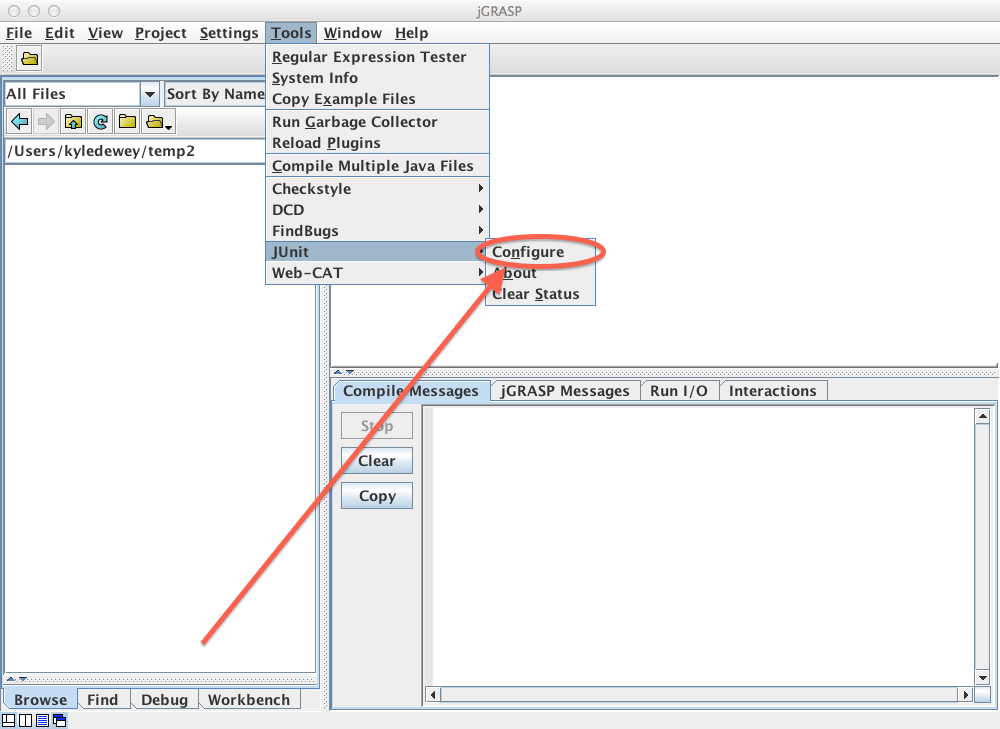
Go to Tools -> JUnit -> Configure.
A screenshot showing this is provided below.
Browse”
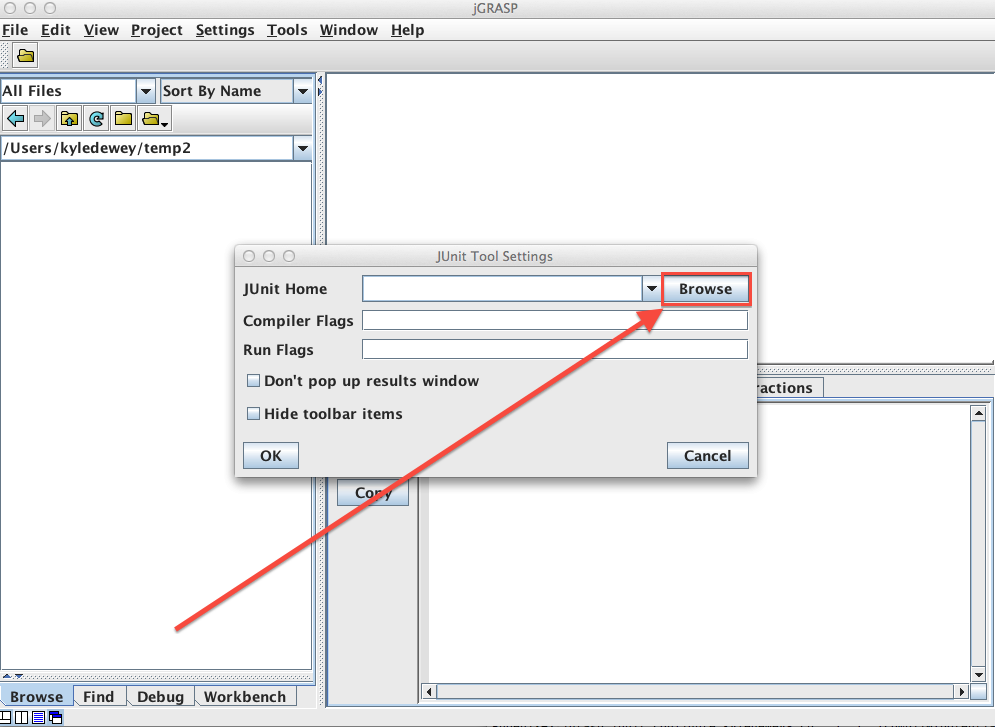
Click the “Browse” button, as shown in the screenshot below:
Using the window that appears after the previous step, navigate to where the folder/directory is which you created in the first step (which should contain JUnit installation files after the second step).
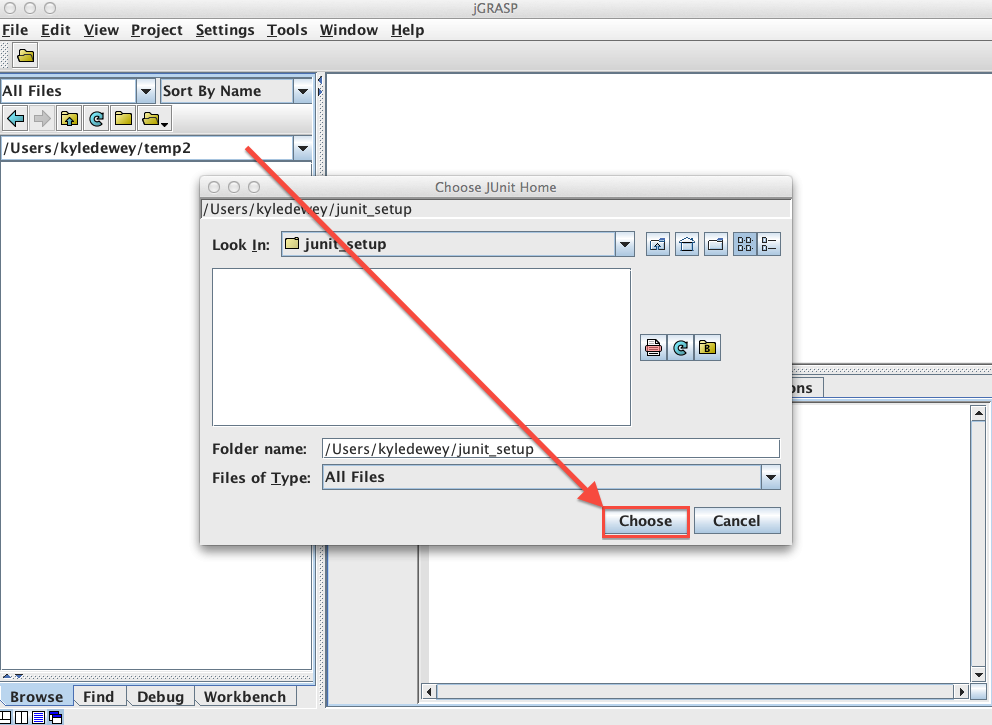
Once you have found the directory, click the “Choose” button.
A screenshot has been provided below to illustrate, where the folder name/location is /Users/kyledewey/junit_setup.
Ok”
Click the “Ok” button, as shown in the screenshot below:
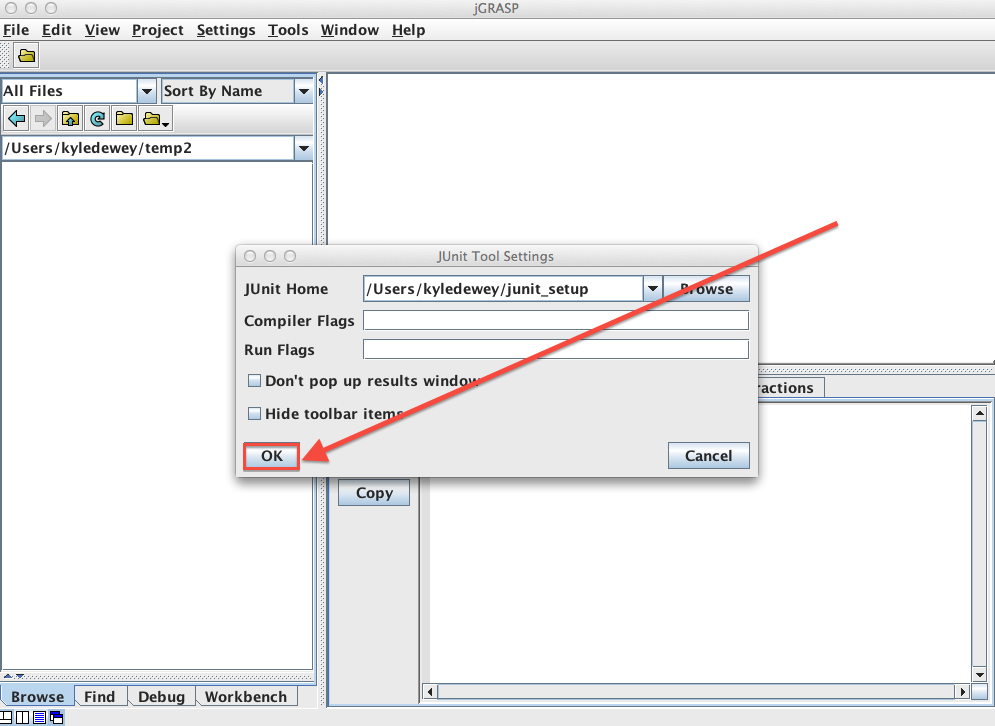
Once you finish this step, jGrasp should be configured with JUnit.
Now that jGrasp is configured to use JUnit, you can run JUnit tests from within jGrasp. That said, there are a couple quirks with running JUnit tests from within jGrasp which you need to be aware of:
Foo.java, then jGrasp assumes that all tests for Foo.java are in FooTest.java.
That is, the name of the file with tests must be the same as the original file, but the class name ends in the word “Test”.
MyCode.java and MyCodeTest.java), jGrasp does not automatically detect that the code in MyCodeTest.java contains tests for MyCode.java.
You need to manually tell this to jGrasp (more information on how to do this follows in the instructions below).
For this class, you'll usually be given some template code (e.g., MyCode.java), along with some template tests (e.g., MyCodeTest.java).
With this in mind, you'll almost always need to tell jGrasp that the tests in a given file correspond to a different file.
The instructions below show how to do this, using the code file AddFive.java and the tests file AddFiveTest.java.
Make sure that your file containing code and your file containing tests are in the same folder/directory.
With our running example, this means that AddFive.java and AddFiveTest.java must be in the same folder/directory.
This is important!
If you fail to perform this step, the subsequent steps will still appear to work somewhat, but your tests won't appear in your tests file (AddFiveTest.java in our running example).
Open the file containing code as you normally would (e.g., AddFive.java in our running example).
You can do this by clicking File -> Open, and then navigating to the code you want to open.
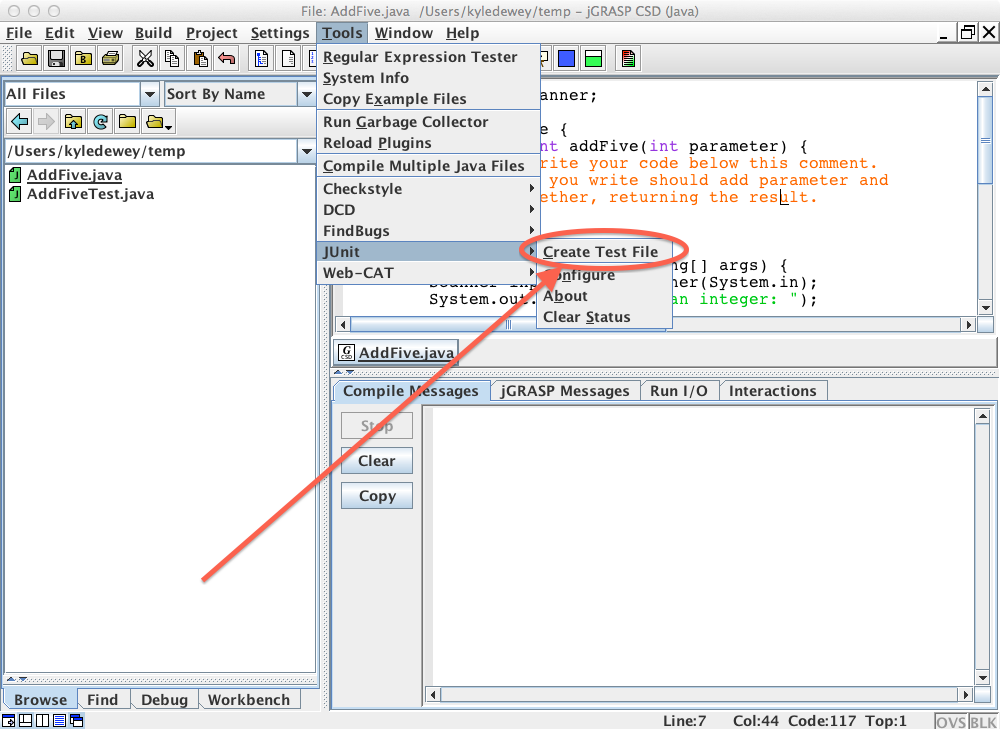
Click Tools -> JUnit -> Create Test File, as shown in the screenshot below.
This tells jGrasp to associate some tests with your code.
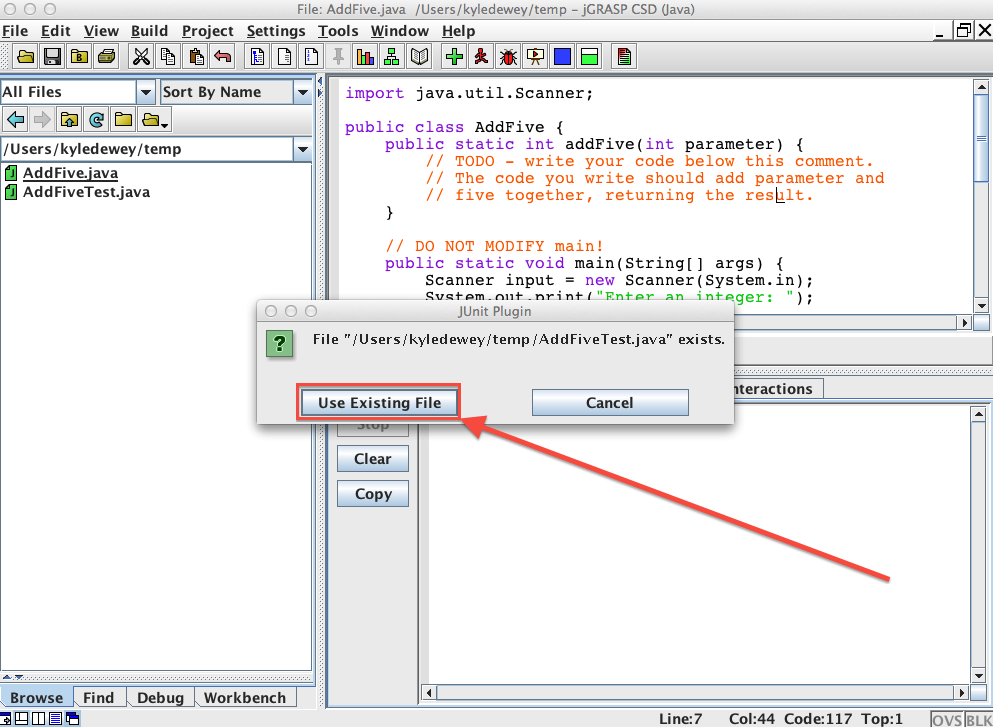
Use Existing File”
Click the “Use Existing File” button, as shown in the screenshot below.
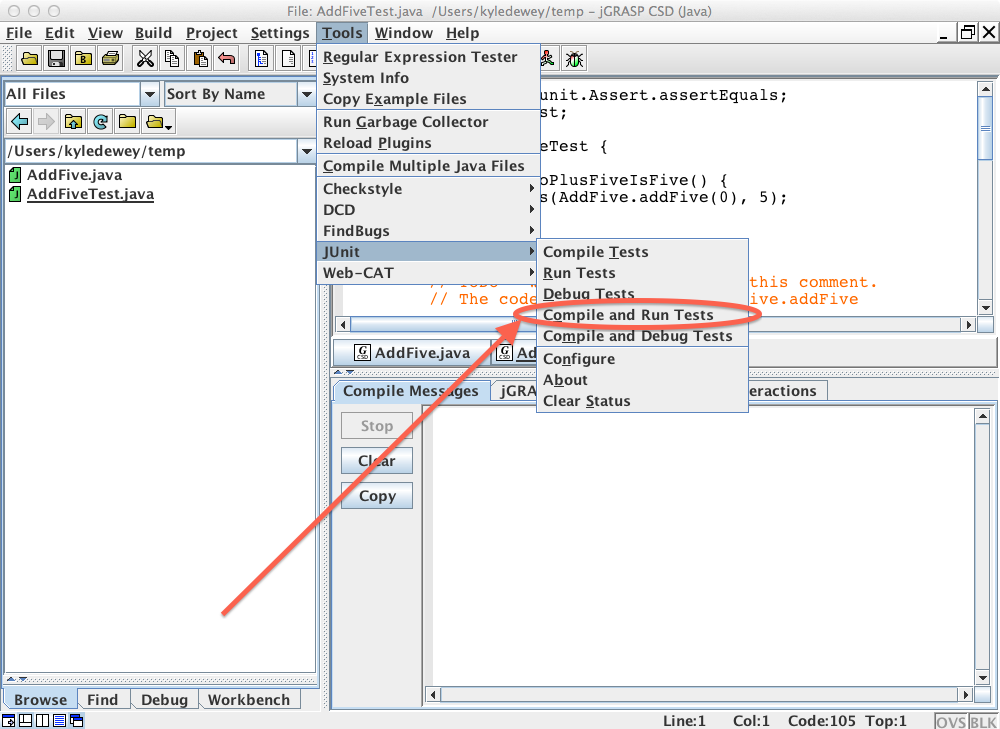
Click Tools -> JUnit -> Compile and Run Tests, as shown in the screenshot below.
Upon completing the previous step, a number of things may happen, depending on the state of your code and tests. Some possibilities follow:
